Edit Student Details and NSN
Student Details are initially entered in People > Students > Enrol Student, and edited from Student Details > Edit tab thereafter.
Viewing or changing students' information
-
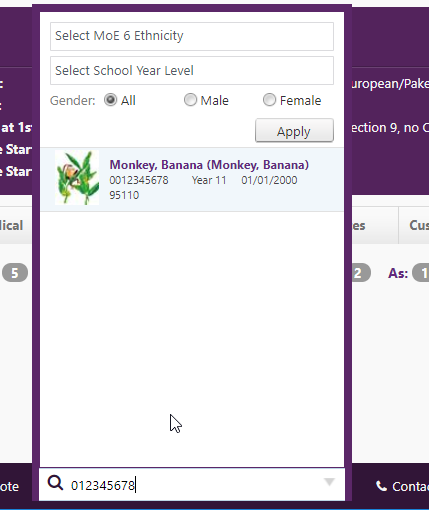
Click in the 'Search for a Student' field at the foot of any page to locate the required student by name or NSN number (begin typing the name or NSN) and select the student. Included in basic details displayed are name, NSN number, Year Group etc.
-
See Arrival Upload Batch, ENROL Process help files and videos for ENROL and Get Check NSN process details.
-
On Student Details pages a photo can be added by clicking the link; it can then be magnified by clicking on the photo to enlarge. Close the enlargement using either the "X"; click away; or when hovering on the picture you'll see a "minus" icon you can click.

-
Student basic detail fields including full name(s), date of birth etc are recorded here. The email address must be unique to the student. Do NOT put a caregiver email address in this field, as this is used for the student portal login, where set up for this. Additional MoE details including ethnicity, and zoning details are entered or edited. Summary information in the purple student banner for each student is drawn from these details.
-
For student address, see Caregiver tab; expand the caregiver and click "Edit". MoE errors 625 & 626 "First Address field is mandatory" (street address) and regarding Third Address (town or city) fields - are resolved on the Edit Caregiver Flags page with the dropdown field where only one caregiver can be selected - for Ministry returns purposes the student has only one caregiver (s)he "Lives With". Once changes have been made click the 'Save Changes' button to save the updated details.


-
Ticking the Independent Youth checkbox (for secondary schools only) means the student is a minimum of 16 years and is living independently. In edge the student becomes their own caregiver. Read more.
-
The 'Start Date Here' field on the Edit Student page represents the first day the student has attended at this school. This should not be confused with the 'First Schooling Date' field for the first day the student attended any school in New Zealand. This First Schooling Date field determines the Ministry Funding Year Level. Ministry Returns tables are calculated on a student's funding year level, ie. calculated from the ‘First Schooling Date’ field, not the ‘School Year Level’ field. While these fields are usually the same, errors can be made in the data entry, or beginning school after July 1 therefore a MoE Year 0, although the student record may be ‘School Year Level’ field as Year 1.
-
Where you need to get the number from ENROL , click 'Check NSN' for any matching data from ENROL, which will return ENROL data on the right, and may return possible matches. Check our knowledge base for ENROL process videos. Where it is appropriate to update student data, tick the box and 'Update Student'
-
Click 'Save Details' in the student's Student Details page where an NSN has now been entered. Where it has been updated from ENROL records, this will occur overnight and display the next day. The status (Unverified/Issue (= no NSN)/Valid updates following overnight verification, or can be manually updated.
-
It is essential the 'Withhold Contact Details' field is used where additional phone and contact details for the Youth Services initiative are NOT to be provided in the .moe file.

-
To change any details click in the required field and type in the changes. For dates when you click in the field the date picker month and year can be changed by clicking on the heading between the arrows, choose the month and year, click OK, then select the chosen date on the calendar shown.
-
The 'New Student' checkbox displays where the Start Date (depending on your School's Start Date setting) is within the last 12 months. This is a Ministry requirement for OTJ reporting, enabling your school to identify those students to report OTJ progress and achievement tables, in the context of them being a New/Not new student. This provides a means of stating your school has not been able to work with these students as long as others (hence they are new) - and therefore OTJs need to be reported separately. This covers the scenario where the OTJs may be lower than those the teacher (or school) has had a full year to work with.
The New student end date provides the timing of when the student stops being in the grouping 'new student' for the purposes of OTJ reporting.
-
An 'English Language Learner' checkbox is used to identify those students who have English as their second language.
-
Ticking the STAR Funding checkbox (for secondary schools only) indicates the student has participated on a STAR course in the previous year up to the 1 March return. The June, July, and September returns report students participating in the current school year. On 1 April each year the STAR Funding tick box automatically resets to default blank. Read more
-
The Tertiary Release Denied checkbox (for secondary schools only and originating from the NZQA Billing page) defaults to permitting NZQA information to be accessed by tertiary institutions. Where email and other contact details are NOT to be released to universities or tertiary institutions, tick the box.
-
For Catholic schools only, further student enrolment preference selections can be made where the enrolment Preference Status field selection 'Preference' enables further criteria. These details then display within Summary > Student Lists reporting.
-
For a new caregiver, from the Caregivers tab, click "Add a caregiver"
 and add in the Surname, First Name and Gender fields (these are compulsory fields). Adding in an email address can also help to find a match of the caregiver to prevent creating a duplicate record. Check with the caregiver to see if they could be known by another name for example Mrs Jo Bloggs could also be Mrs Joanne Bloggs or Mrs Joanne Bloggs-Smith. If you get stuck and are unable to add in the caregivers email address as it is already in use by another user please email the support team at support@edgelearning.co.nz the caregivers first and surname, email address and the name of the student they are associated with and they will try to assist you with finding a match.
-
The Relationship dropdown for the caregiver includes Mother, Father, Stepmother, Stepfather, Aunt, Brother, Counsellor, Case Worker, Cousin, Extended Family, Family Friend, Foster Parent, Godparent, Grandfather, Grandmother, Guardian, Homestay etc. When entering an email address for a caregiver, student or staff member, if the email exists already in the edge system (therefore is a "duplicate"), you may receive a duplicate email address warning. This is important because email addresses are used as logins and therefore need to be unique to the individual. Read more
-
Save any edited details.
Looking for more answers? email support with your question.