Creating a Manual Timetable
With the Timetabler user responsibility, Timetable leads you to the setting up process, including checklist.
When do I make changes to the timetable?
|
Required Change |
Details |
How do I make this change? |
|
Change classes for a student |
Single student, no new classes required. |
|
|
Change form class teacher |
No clashes or other classes impacted. |
|
|
Change teacher on class |
Change will generate clashes. |
Modify the relevant timetable. |
|
Add a new form class |
||
|
Add a new subject class to the timetable |
Modify the relevant timetable. |
|
|
Rotate option lines |
e.g. for the new term |
Modify the relevant timetable. |
|
Change period times |
e.g. winter period times |
Modify the relevant timetable. |
|
Close school for a day |
e.g. weather |
|
|
Event day |
e.g. sports day |
Creating a timetable process
The Create/Edit timetable page enables you to create or edit a new timetable, manually, or to elect the automatic generation process. Using the 'Copy' button you can re-use previous settings for a new timetable. The timetabling process involves steps beginning with defining your academic year with start and end dates, followed by timetable structure and displays a checklist on the pre-requisites (Setup) page. The timetable has a maximum of 12 days and 10 periods per day.
- Provided you have been allocated the responsibility 'Timetabler', see Timetable > Configuration > Create/Edit Timetable page
- A timetable checklist is provided identifying the pre-requisites in order to set up a timetable, and record that these have been actioned. The Timetable setup page contains the required detail before starting to create a timetable, with the tick boxes provided as a reminder of the tasks already completed so far.
It is possible but not desirable for a timetable to be created without having assigned teachers to Location/s.
The Create/Edit page contains the steps in order for successfully creating a timetable. Summary information is provided for each section to show current status. Click the hyperlink to take you to the relevant page to amend any data as required.
Step 1. Configuration incorporating Basics, Bands, Cycle Periods, Period Times and Connect Option Lines.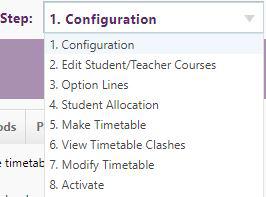
Step 2. Edit Student/Teacher/Courses
Step 3. Option Lines
Step 4. Student Allocation (view only)
Step 5. Make Timetable
Step 6. View Timetable Clashes
Step 7. Modify Timetable
Step 8. Activate incorporating Calendar & Dates
Timetable Setup Wizard
Step 1. Configuration
Basics
First decide whether you're wanting to create your timetable manually, or use the new automated creation of a best-fit timetable for staff and students. When the automatic creation process has been chosen, a purple banner displays at the top of your page. The instructions which follow are for the allocation process manually.
The basic new timetable structure is determined with number of days in cycle, and number of subject periods. The number of days for the timetable cycle cannot be edited in an existing timetable, however the maximum number of subject periods held within the week day, or cycle day, can later be reduced.
Button to apply "Use automated timetabling" (under development)
Note that to view/edit a timetable - save, and activate again to have a new form class (and any changes made to classes eg. rooms) appear in the timetable.
To create a timetable:
-
select the calendar year
-
name the timetable appropriately, eg. '2021 Semester 1'
-
enter the number of days in a school cycle; and
-
nominate the maximum number of subject periods in a given day (Note: you can reduce individual periods as required later)
-
When you have entered the above details, click Save to create your timetable
Bands
A band is a collection of year levels, the timetable defaults to all year levels within your school to being in one band.
To group students together, you can create individual bands, eg. juniors, seniors, or those year levels who share time together (assembly). To do this, add another band, name it appropriately, and define which year levels are included. Ensure all year levels are included within one band.
Cycle Periods
The cycle page reflects the grid structure chosen on the Basics tab configuring the basic structure. As default, all periods on each day of the cycle are active (ticked).
To remove periods from timetable display within a timetable band, untick the period to remove, and Save.
Period Times
To set up or edit period times, drag and drop the labels from the left side on to the grid. Lunch and break times, assemblies are included in the categories. Once the label has been dragged onto the grid, it can be adjusted vertically to give the correct time length. If the Monday structure is, for example, indicative of the rest of the week, you can copy it across to the other days using the link. You can still edit and change period times throughout the cycle after this. For example to change period times for winter, do this by modifying the relevant timetable.
Save your settings as you go (as you would for a large document.) Ensure it is configured for each day, and for each band.
Connect Option Lines
Now you have collated subjects by option lines (defaulted to the A-F naming pattern), you can state which option lines are to take place on a given day and period. You can view individual year levels by clicking the appropriate link. You MUST save these settings.
This is usually a one time process as 're-connecting' will remove any additions, such as core classes, you have applied to Modify Timetable page (Step 7).
Step 2. Edit Student/Teacher/Courses
The second step in the timetable process (for provisional students in courses only) shows a collation of courses a student has selected. This step opens by default on the Students tab for course selection, where they can be filtered by year level and/or the course that is associated with the student.

The following status types are available to show:
Requested: The student entered this through the Student portal
Approved: The Assessment Coordinator or Timetabler has approved the student doing this course.
Note: Compulsory courses are automatically approved.
Excluded: This status provides for compulsory courses where the student is NOT to be allocated the course during timetabling.
Confirmed: The student is currently in a subject class for that course. This status is derived from the data, and cannot be assigned.
By clicking in the cell, courses can also be selected for the student - colour indicates this student has reached the course number for the year level previously set.
-
To change a form class teacher where no clashes or other classes are impacted, change the teacher in Define Class.
-
To change the teacher on a class, where the change will generate timetable clashes, modify the relevant timetable.
-
To change classes for an individual student where no new classes are required, from Student Details change the student membership.
Click "Create Classes" when you're ready, and a message displays what you're about to create before going ahead and confirming.
Step 3. Option Lines
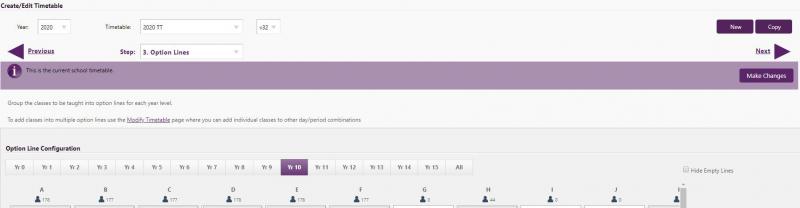
Here subject classes are grouped into option lines for each individual year level. The subject class filter allows selection year level(s), OR Course(s), OR Subjects(s) with multiple values in the same category (subject level or course or subject).
You can filter on both Not Assigned, and Assigned fields in the filter. Unassigned classes will be listed in the Not assigned box below the filter. To assign a class, click and drag it across onto the appropriate option line. This can be reversed by dragging the subject class from an option line to the Not assigned box. Save each Year Level as you add classes to them.
To view unassigned classes by instructional year level course and/or subject, use the filter. Results are displayed in the Not assigned box. Empty lines can be hidden from view using the check box. For good practice, save after you have completed each year level.
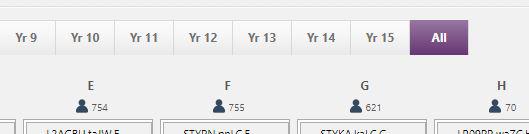
Click on the "All" tab which conveniently displays all options for all year levels on one page.
To rotate option lines (eg. for the new term), modify the relevant timetable.
Step 4. Student Class Allocations
You can export or print the selected year level allocations, note the choices to filter for "Show clashes only" or "Show under-allocated only". For more, see our Class allocations article.
To add a new class, see People > Memberships > Define Class; to add a new class to the timetable, modify the relevant timetable.
If the grid does not display (eg. first time using Step 6 in this timetable), click "Allocate".
- You can export or print the selected year level allocations, note the choices to filter for "Show clashes only" or "Show under-allocated only".
- Click beside the student name to expand the chevron which will display all the courses the student has been approved to take within each option line. Any clashes the student may potentially have in that option line are highlighted as per the key. To remove a particular course from this student, click in the cell and the colour will change.
- Click "Save changes" to apply this change. Click the chevron again to close the detail, and the change will be reflected in the table as a blank. If you wish to see which course had been changed, this is still visible in the expanded detail for the student, and now displays in a different colour.
Step 5. Make Timetable
Once you're satisfied with all the above steps the timetable can be generated. Note this involves using the data to build the timetable structure. When you move a course between option lines, or adjust a teacher, on "Save" the changes display.
Step 6. View Timetable Clashes
Any clashes in the timetable created will be displayed.
Step 7. Modify Timetable
The Modify Timetable page provides the following tabs for viewing the timetable by either:
All, Year Level, Teacher, Student, Class, Location, or Band
To edit any subject class, click on it to edit the current data.
To add a class click 'Add Class' in the relevant cycle/period. If the timetable you are working on is the active timetable, you will need to click "Make Changes" and the "Add Class" buttons will be available as shown below.
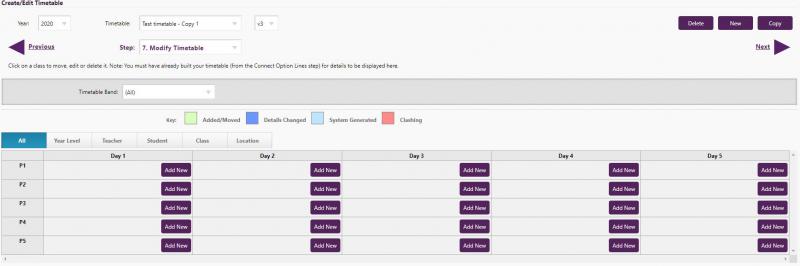
The following describes the colours shown in the colour key at the top:
Added/Moved: Classes created by the option line settings configured in step 4 and step 5 that have been moved from the generated day period slot in step 8,
OR
Classes that have been added to the timetable in step 8 using the “Add Class” buttons.
Details Changed: Classes created by the option line settings configured in step 3 but teacher or room details have edited in step 8.
System Generated: Classes created by the option line settings configured in step 3
To fully save your additions to the Modify Timetable page click through to Step 8 - Activate, and Activate your timetable for the relevant dates. This needs to be done before moving to any other page except for when you may open a page in a new tab.
Step 8. Activate
Calendar & Dates
In setting the start and end dates, and set the date/s you wish the new or modified timetable to take effect (if not using the automated option). When nominating the cycle day (eg. if applying a change and those take effect on a Thursday, ensure the first cycle day is '4'.
To close school for a day (eg. inclement weather), change the open days in your calendar from the Setup menu. To nominate or change an event day (eg. sports day), change the event days in your calendar.
From the Calendar & Dates tab, click "Activate" to apply this timetable. Bear in mind that allocations are not able to be reapplied for subsequent activations of that timetable, regardless of versioning, and become read-only mode for allocating students. To apply another set of allocations, a completely new timetable will have to be created.
For more good practice with timetabling, see our Timetabling Tips article.
Looking for more answers? email support with your question.