Bulk Discount/Reversal
This allows you to apply a bulk discount to a billed item or apply a bulk reversal of a billed item across either the Whole School or a filtered range of students.
How can you reverse or discount a whole group of students at once?
You can select a date range and a student filter ie Whole School or filter to a Year Level/s. You can include leavers by ticking the tick box provided.
Select the relevant Billable Item from the dropdown selection and click on Display. 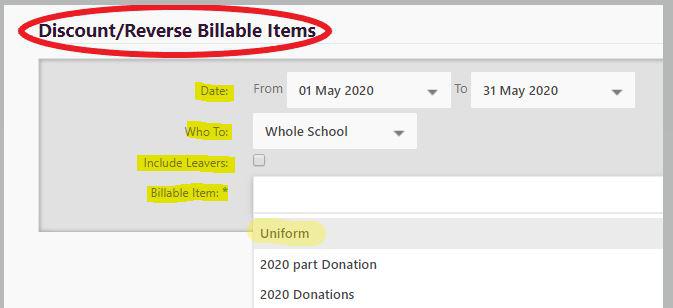
The screen will then populate with Discount and Reverse buttons. You are in Discount by default.
This process adds a discount to the billable item for selected students. Any overpayments made as a result of the new discount will be added to Unallocated Credit. A discount of $0.00 will result in no discount being made.
You must enter the reason for the discount in the box provided.
Enter the amount the item is to be discounted by in the Discount Amount field by either using the arrows or typing in the amount. 
Below this will be listed all of the matching student transactions that the discount entered will be applied to.
When you click on the Apply to All button next to the Discount Amount field, the selected amount will appear in the Discount Amount column after all of the transactions listed.
If the discount is unable to be applied to any of the student transactions it will be highlighted:

You may get a message that “This item can not be discounted”.
This may be because the item has since been reversed on the student’s transaction summary screen so a discount is not applicable.
You may get a message “Discount can not be greater than $N” when the item has already had a discount applied to it and the discount that you are currently trying to process is more than the undiscounted balance of the item left.
Make any corrections as required.
You can individually adjust any particular student discounts up or down from the figure that had been entered as the Discount Amount.
Click on Apply Discount to proceed with applying these discounts to the listed transactions.
You will be prompted to confirm that you want to proceed with applying the discount
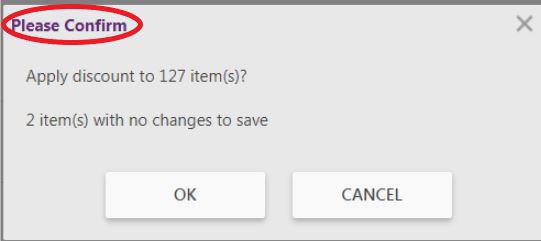
Clicking on Cancel will return you to the screen you were on prior to clicking Apply Discount with all of the transactions listed.
Clicking on OK will apply the Discount and you should have a green success message at the bottom right of your screen. The screen will refresh to show the Total Discounted and the new Total Owing after the discount was applied.
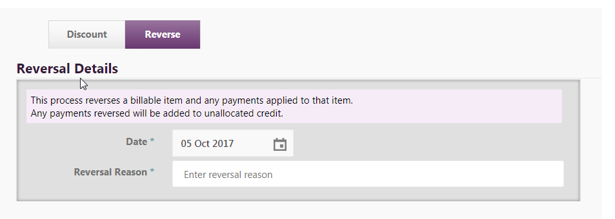
In the Reverse Button you can reverse a billable item and any payments that have been applied to that item in bulk. Any payments reversed will be added to unallocated credit.
You need to select the date and the reason for the reversal. The date will default to today’s date.
Students who have been billed the selected item will list their transaction below.
If a student has already had the item reversed previously, it will list on screen but appear highlighted with the message “This item has already been reversed”.
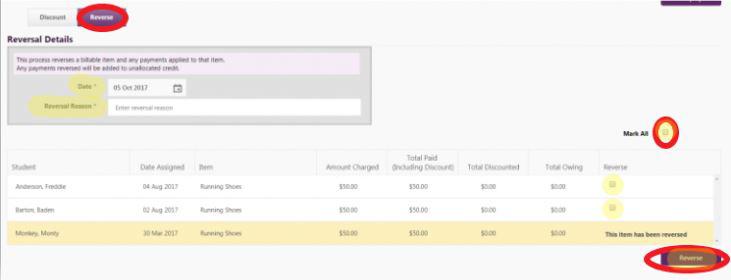
You can individually select the students that you want to reverse the item for by ticking the Reverse tick box or alternatively use the Mark All option to select them all and then untick some if required.
Click on the Reverse button.
You will be prompted to confirm that you want to proceed with applying the Reversal:
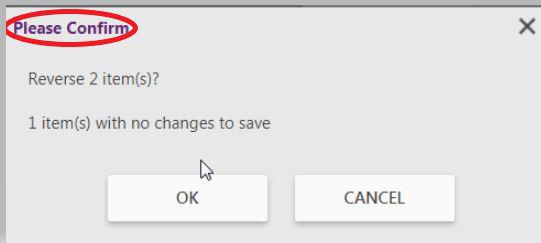
Clicking on Cancel will return you to the screen you were on prior to clicking on Reverse with all of the transactions listed.
Clicking on OK will apply the Reversal and you should have a green success message at the bottom right of your screen. The screen will refresh to show that the Reversal has been actioned and that the Total Owing is now $0.00 for the selected students.

Looking for more answers? email support with your question.